Introduction
WhatsApp Chat for WordPress plugin allows you to integrate your WhatsApp experience directly into your website. This is one of the best way to connect and interact with your customer, you can offer support directly as well as build trust and increase customer loyalty.
Features:
Here you will find the main features which are included in ‘Whatsapp Chat Support ‘ Plugin.
- Display WhatsApp Chat Support with custom design options to attract visitors.
- You can add multiple agent.
- You can set agent name with designation.
- You can set agent status with custom messages.
- Also, you can set default message to send directly.
- You can set chat-box heading main title and sub title.
- We have given agent shortcode display. You can use in any page.
- Fully Responsive.
- 100% Multi language.
Installation
Installation of Whatsapp Chat Support requires a few clicks. To install the plugin, please use the following steps:
- At the InboundWP plugin Dashboard page, Click on Modules tab and there you will get all the modules.
- In bottom you can see “Whatsapp Chat Support” module. You can enable from there.
- Save Your Changes.
- Now your module is activated and you can see a message ‘your changes have been saved successfully’ at the top of the window.
Now your Whatsapp Chat Support installed successfully!
Note: If you enable/disable the module, then you have to click on “Save Changes” button to make it live.
Your changes saved successfully.
Getting started with Whatsapp Chat Support
Whatsapp chat support adds a Menu tab in WP Admin side with the name “WhatsApp Chat Support-IBWP” where you can add, update, delete support agents.
Bellow screen shows “All Agents”.

How to add WhatsApp Agent?.
- Go to WhatsApp Chat Support-IBWP Tab and click on Add New.
- Add Agent title and Agent details.
Screen shows “Add New Agent” from the left side.
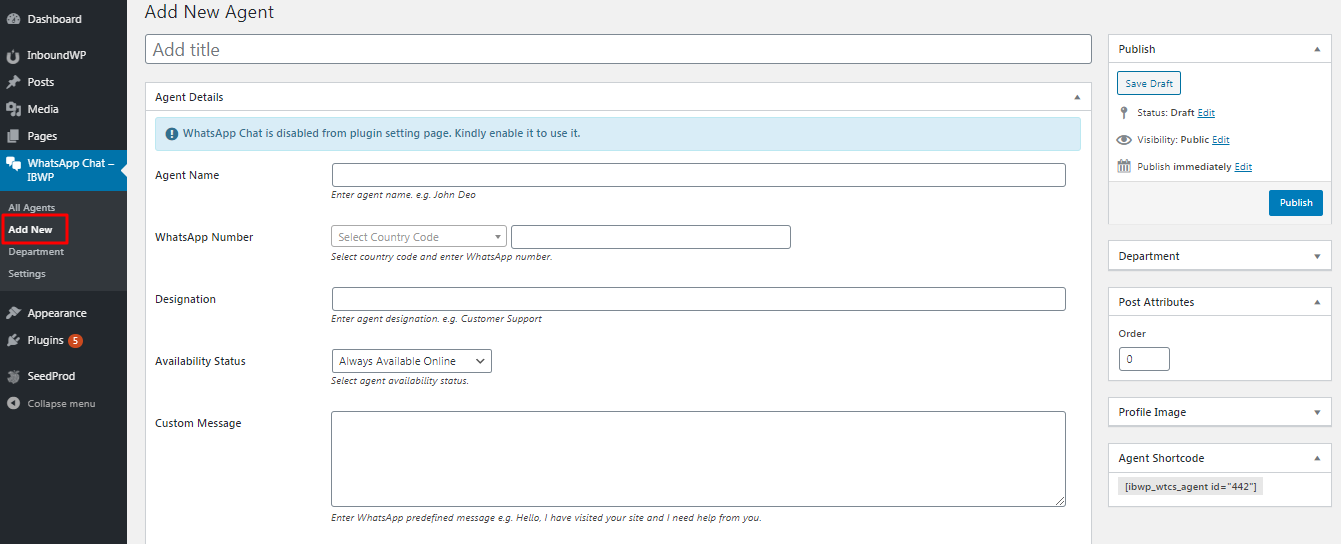
- Agent Name: Set Agent name.
- WhatsApp Number: Set WhatsApp number with country code. E.g.: +529999999999.
- Designation: Set designation.(e.g.: Customer Support).
- Status: Select status online or offline.
- Custom Message: Set WhatsApp predefined message.
WhatsApp Chatbox Settings
Add Custom CSS(Post Type wise)1) Bellow screen shows “Chatbox General Settings”
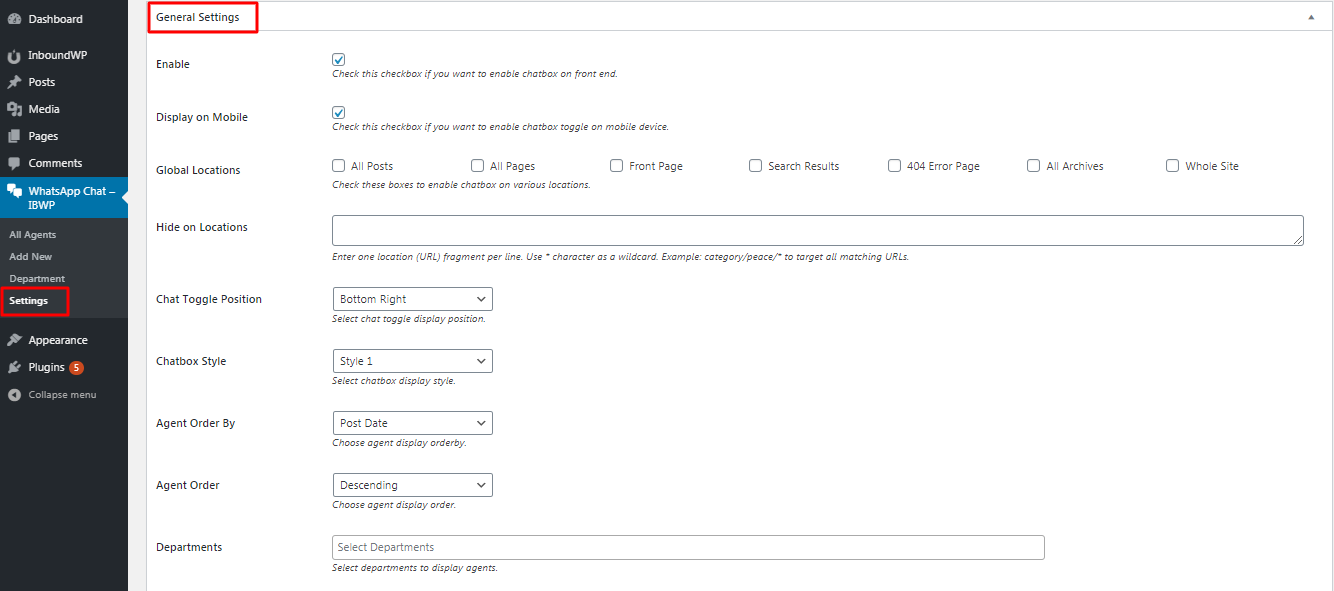
- Enable: Mark this box if you want to enable chatbox on front end.
- Mobile Display: Enable/Disable checkbox for display in Mobile device.
- Global Location: You can set for specific location or Whole site by enable checkbox.
- Hide on Location: Hide this chatbox in specific location.
- Toggle Position: Set chatbox toggle position.
- Chatbox Style: .You can select chatbox style from dropdown.
- Chat Agent Order By: You can select agent order by from dropdown for display.
- Chat Agent Order: Set Ascending/Descending agent order from dropdown.
- Agent Department: Select agent department.
2) Bellow screen shows “Chatbox Text Settings”
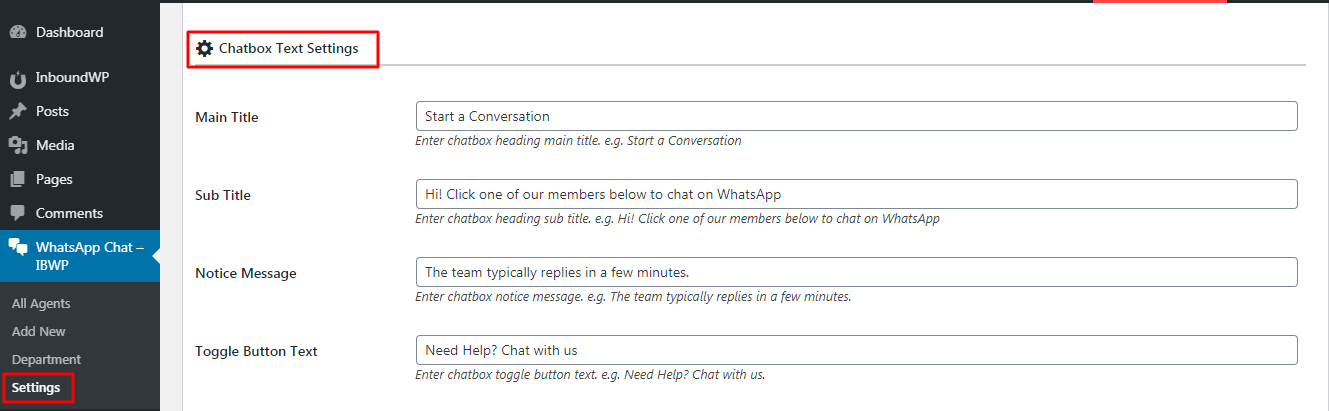
- Main Title: You can set main title for chatbox.
- Sub Title: You can set sub-title for chatbox.
- Notice Message: You can set notice message for user.
- Toggle Button Text: You can set toggle button text.
3) Bellow screen shows “Chatbox Design Settings”
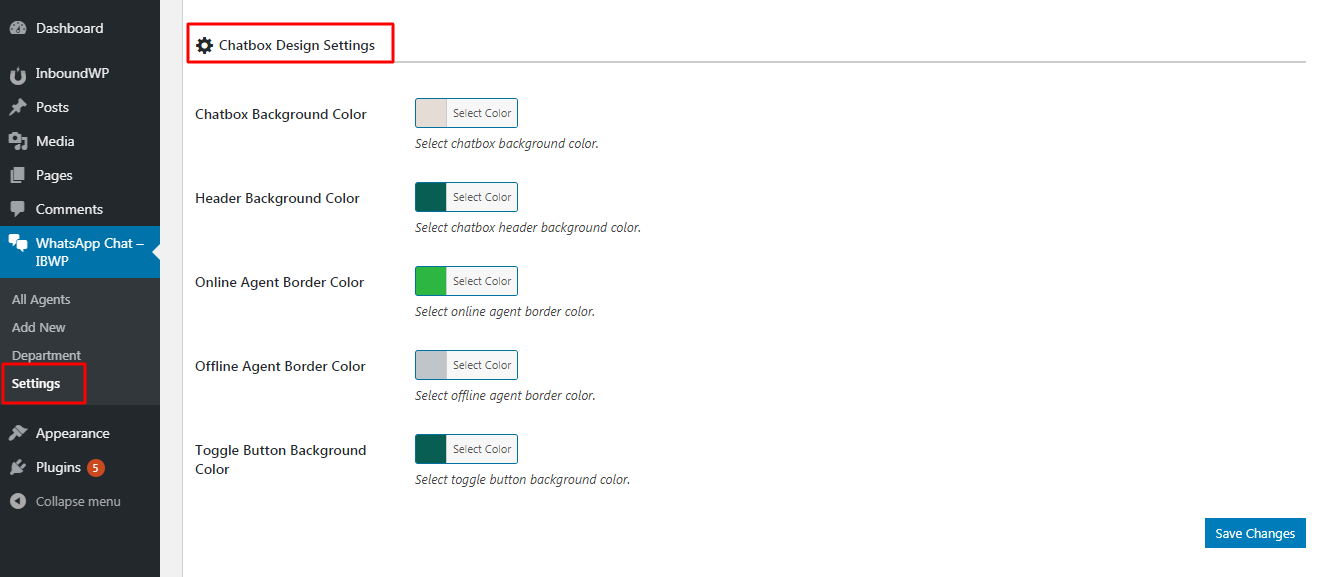
- Chatbox Background Color : You can set Chatbox Background Color.
- Header Background Color : You can select chatbox header background color.
- Online Agent Border Color : You can select online agent border color.
- Offline Agent Border Color : You can select offline agent border color.
- Toggle Button Background Color : You can select toggle button background color.
4) Bellow screen shows “Chatbox Google Analytics Settings”
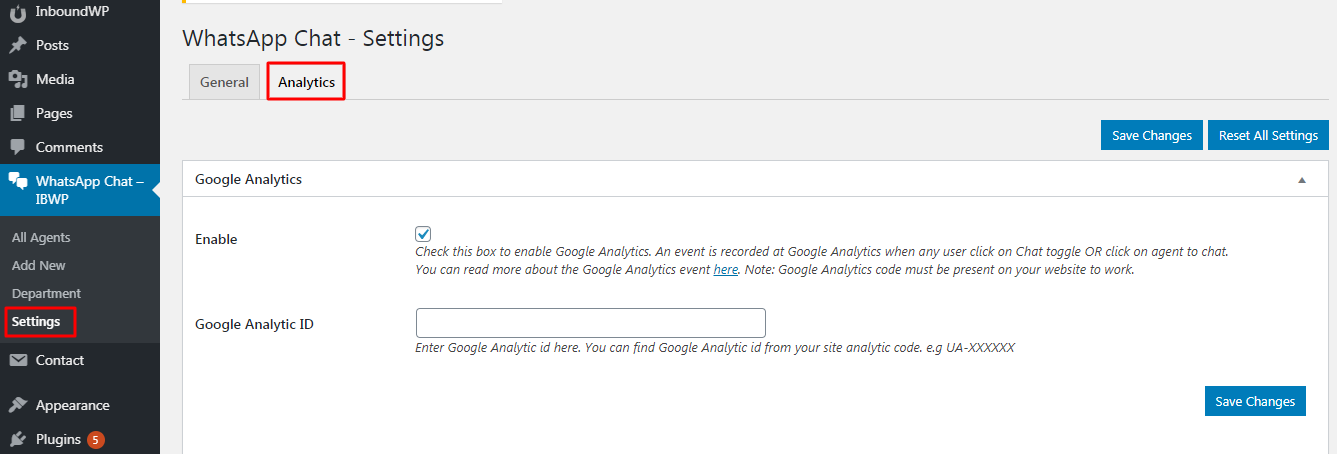
- You can enter google analytics id and enable checkbox for that.