Introduction to Popup Anything Pro – A Marketing Popup
Display a modal popup on Page Load, After X Second of Inactivity, When Page Scroll Down, When Page Scroll UP, Exit Intent, Simple Link, Image Click, Button Click, HTML Element Click and more for WordPress website that allows you to add highly customizable popup windows.
Popup Anything Pro – A Marketing Popup plugin enable awesome popup in your WordPress website using short codes. With popup builder plugin you can insert any type of content into your Popup (HTML, Image, Shortcodes etc). Insert your popup shortcode into any page or a post, easily and fast.
Getting started with Popup Anything Pro – A Marketing Popup
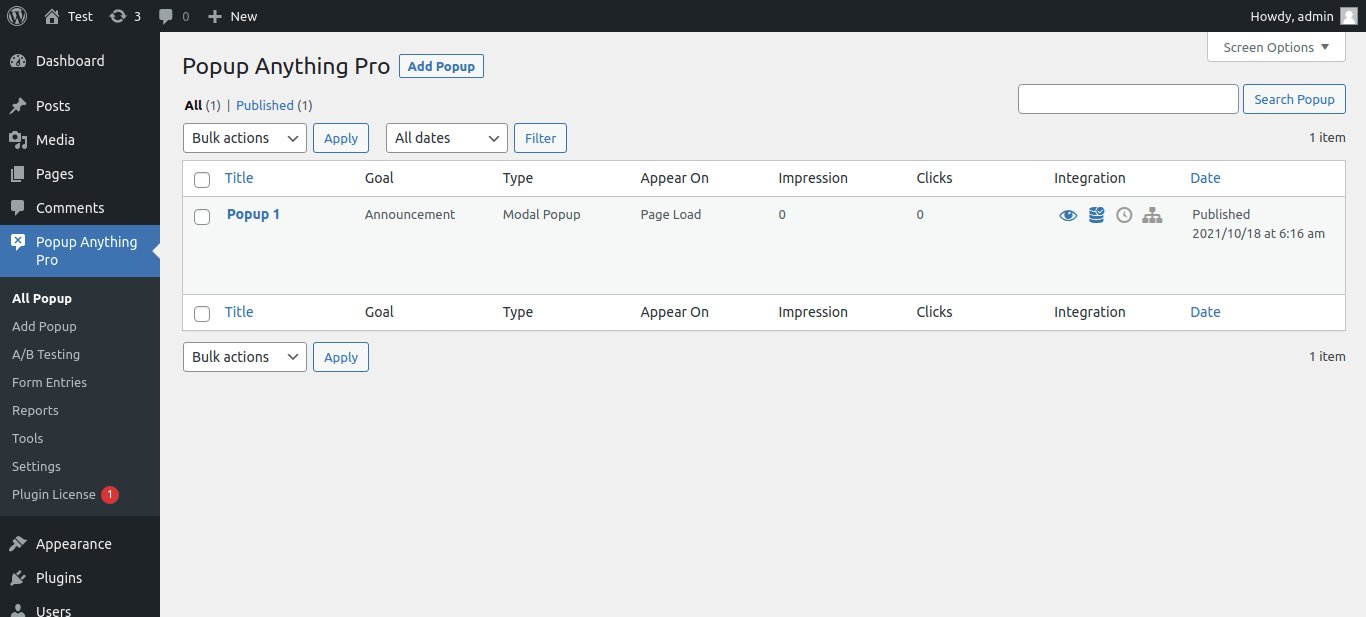
Popup Anything Pro – A Marketing Popup adds a Menu tab in WP Admin side with the name “Popup Anything Pro” where you can add Title, Content, and set all settings for Popup.
Screen shows “Popup Anything Pro – A Marketing Popup” tab in the left side and all Popup post added with shortcode.
Popup Anything Pro – A Marketing Popup Settings
# General Settings
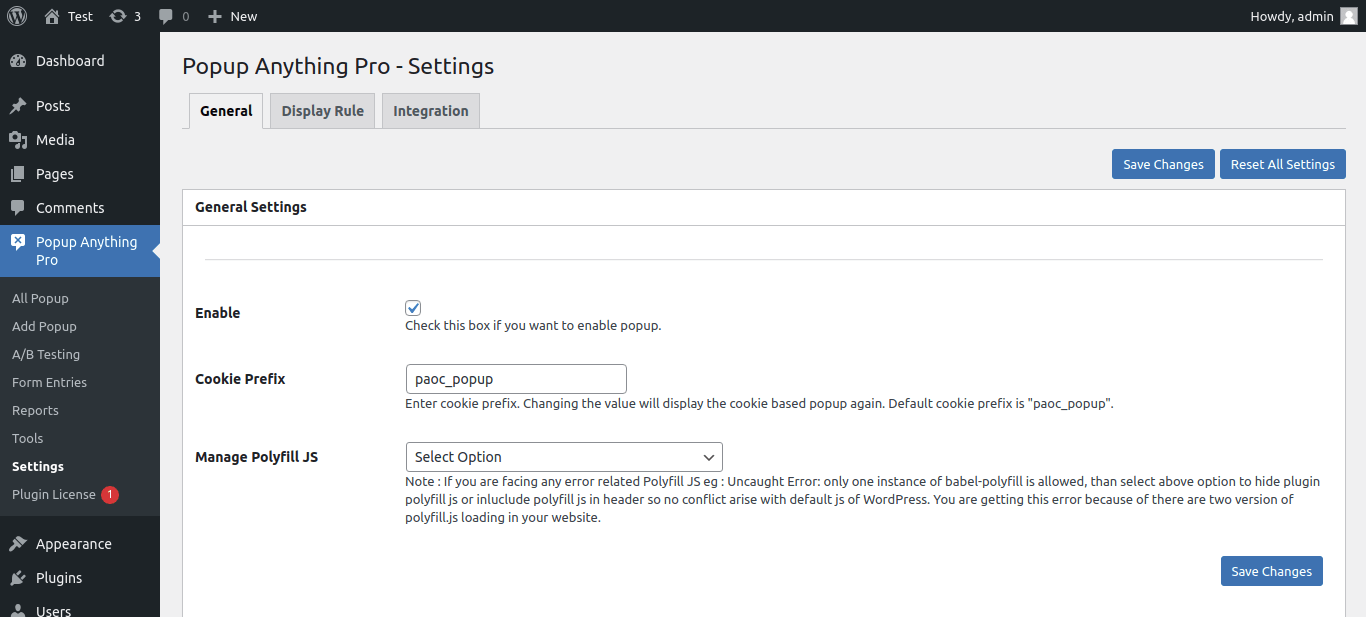
- Enable : Check this box if you want to enable popup
- Cookie Prefix : Enter cookie prefix. Changing the value will display the cookie based popup again. Default cookie prefix is “paoc_popup”.
- Manage Polyfill JS : Note : If you are facing any error related Polyfill JS eg : Uncaught Error: only one instance of babel-polyfill is allowed, than select above option to hide plugin polyfill js or inluclude polyfill js in header so no conflict arise with default js of WordPress. You are getting this error because of there are two version of polyfill.js loading in your website.
# Display Rule Settings :
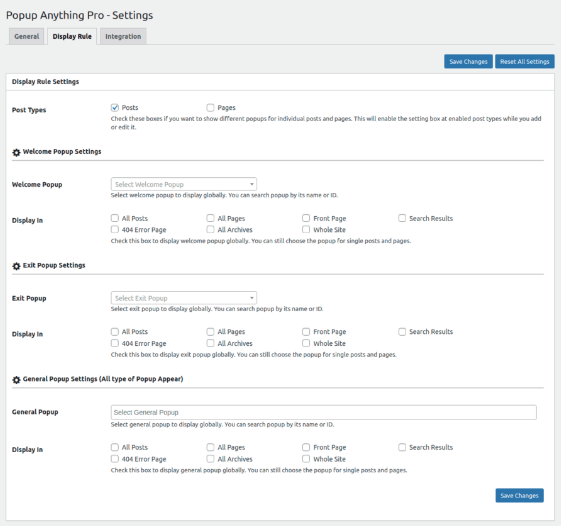
- 1. Post Types : Check these boxes if you want to show different popups for individual posts and pages. This will enable the setting box at enabled post types while you add or edit it.
A) Welcome Popup Settings :
- Welcome Popup : Select welcome popup to display globally. You can search popup by its name or ID.
- Display In : Check this box to display welcome popup globally. You can still choose the popup for single posts and pages.
B) Exit Popup Settings :
- Exit Popup : Select exit popup to display globally. You can search popup by its name or ID.
- Display In : Check this box to display exit popup globally. You can still choose the popup for single posts and pages.
C) General Popup Settings (All type of Popup Appear) :
- General Popup : Select general popup to display globally. You can search popup by its name or ID.
- Display In : Check this box to display general popup globally. You can still choose the popup for single posts and pages.
How to add Popup :
- Go to Popup Anything Pro – A Marketing Popup and click on Add Popup.
Below screen shows how to add a Popup post
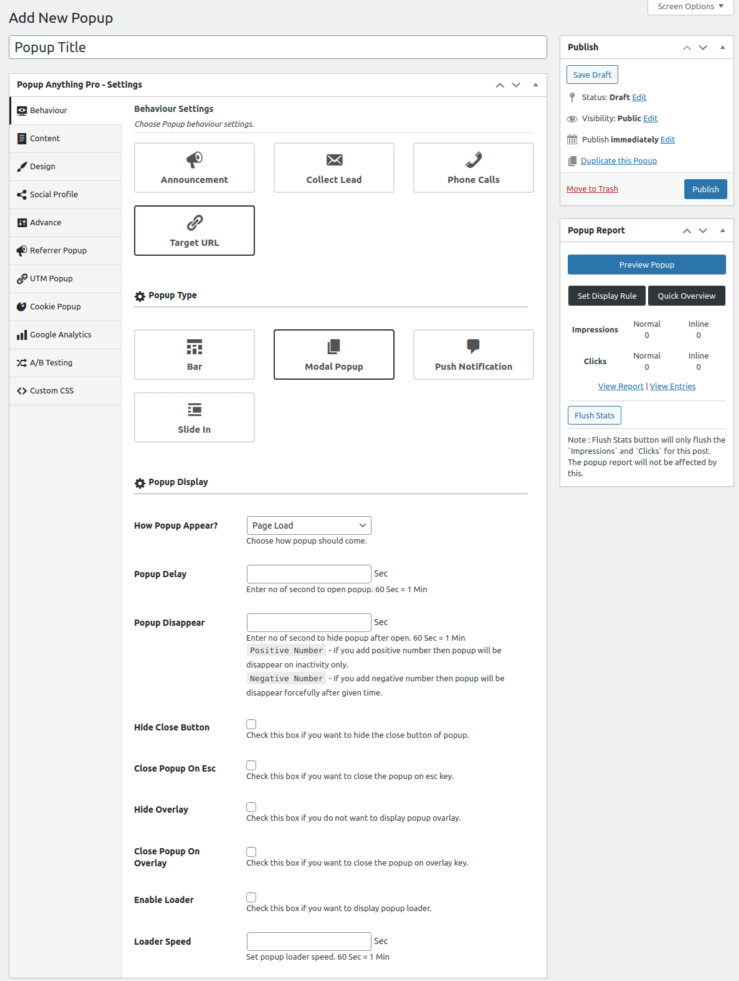
# Behaviour Settings :
- Popup Goal : You can Choose Announcement, Collect Lead, Phone Calls, Phone Calls, Target URL.
- Popup Type : You can Choose Bar, Modal Popup, Push Notification, Slide In.
- How Popup Appear : Choose how popup should come.
- Popup Delay : Enter no of second to open popup. 60 Sec = 1 Min
- Popup Disappear :Enter no of second to hide popup after open. 60 Sec = 1 Min
Positive Number– If you add positive number then popup will be disappear on inactivity only.Negative Number– If you add negative number then popup will be disappear forcefully after given time. - Hide Close Button : Check this box if you want to hide the close button of popup.
- Close Popup On Esc : Check this box if you want to close the popup on esc key.
- Hide Overlay : Check this box if you do not want to display popup ovarlay.
- Close Popup On Overlay : Check this box if you want to close the popup on overlay key.
- Enable Loader : Check this box if you want to display popup loader.
- Loader Speed : Set popup loader speed. 60 Sec = 1 Min
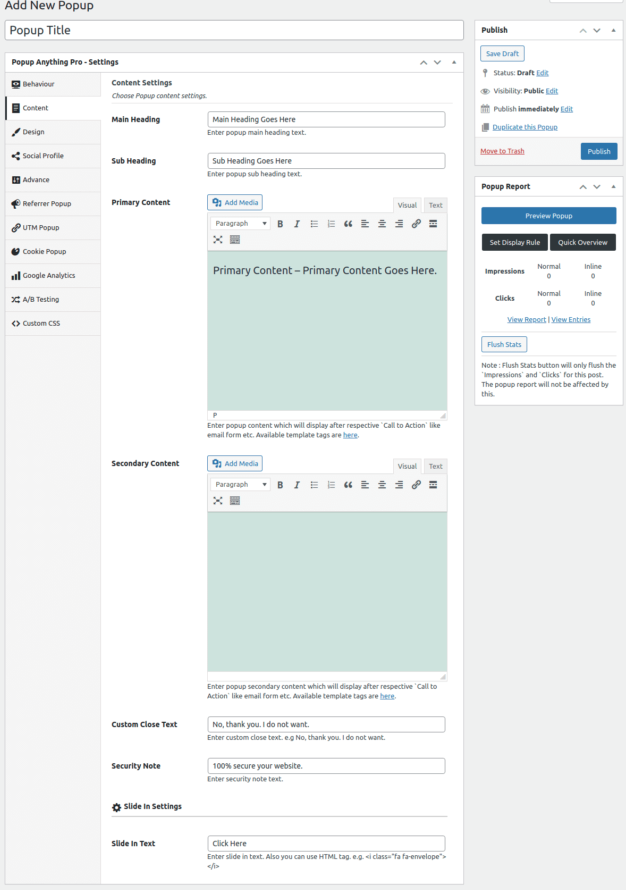
- Main Heading : Enter popup main heading text.
- Sub Heading : Enter popup sub heading text.
- Primary Content : Primary Content Goes Here. Enter popup content which will display after respective `Call to Action` like email form etc. Available template tags are here.
- Secondary Content : Secondary Content Goes Here. Enter popup secondary content which will display after respective `Call to Action` like email form etc. Available template tags are here.
- Custom Close Text : Enter custom close text. e.g No, thank you. I do not want.
- Security Note : Enter security note text.
- Slide In Text : Enter slide in text. Also you can use HTML tag. e.g. <i class=”fa fa-envelope”></i>
# Design Settings :
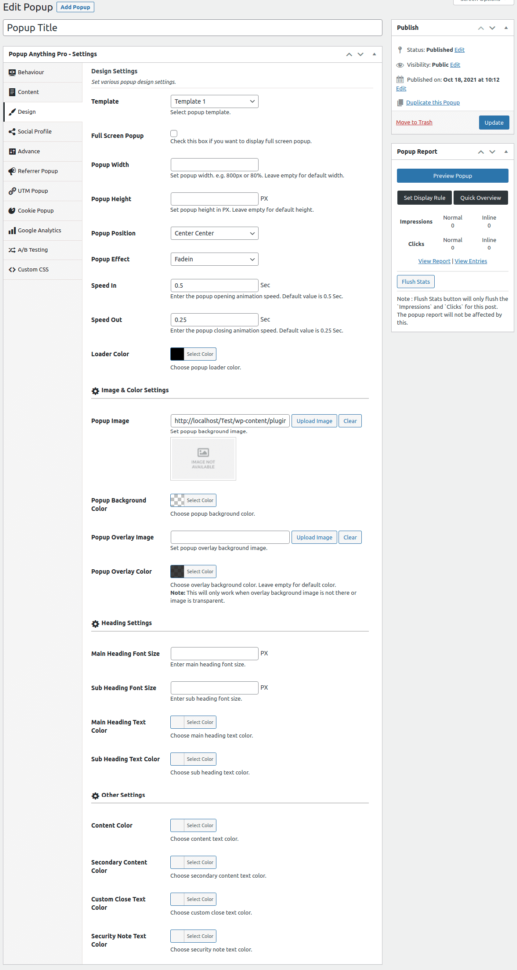
- Template : Select popup template.
- Full Screen Popup : Check this box if you want to display full screen popup.
- Popup Width : Set popup width. e.g. 800px or 80%. Leave empty for default width.
- Popup Height : Set popup height in PX. Leave empty for default height.
- Popup Position : You can set popup Position.
- Popup Effect : You can set popup Effect. There are many types of effects.
- Speed In : Enter the popup opening animation speed. Default value is 0.5 Sec.
- Speed Out : Enter the popup closing animation speed. Default value is 0.25 Sec.
- Loader Color : Choose popup loader color.
A) Image & Color Settings :
- Popup Image : Set popup background image.
- Popup Background Color : Choose popup background color.
- Popup Overlay Image : Set popup overlay background image.
- Popup Overlay Color : Choose overlay background color. Leave empty for default color.
Note: This will only work when overlay background image is not there or image is transparent.
B) Heading Settings :
- Main Heading Font Size : Enter main heading font size.
- Sub Heading Font Size : Enter sub heading font size.
- Main Heading Text Color : Choose main heading text color.
- Sub Heading Text Color : Choose sub heading text color.
C) Other Settings :
- Content Color : Choose content text color.
- Secondary Content Color : Secondary Content Color.
- Custom Close Text Color : Choose custom close text color.
- Security Note Text Color : Choose security note text color.
D) Collect Lead Settings :
- Field Label Color : Choose field label color.
- Field BG Color : Choose field background color.
- Field Text Color : Choose field text color.
- Button BG Color : Choose button background color.
- Button Text Color : Choose button text color.
- Button BG Hover Color : Choose button background hover color.
- Button Text Hover Color : Choose button text hover color.
# Social Settings :
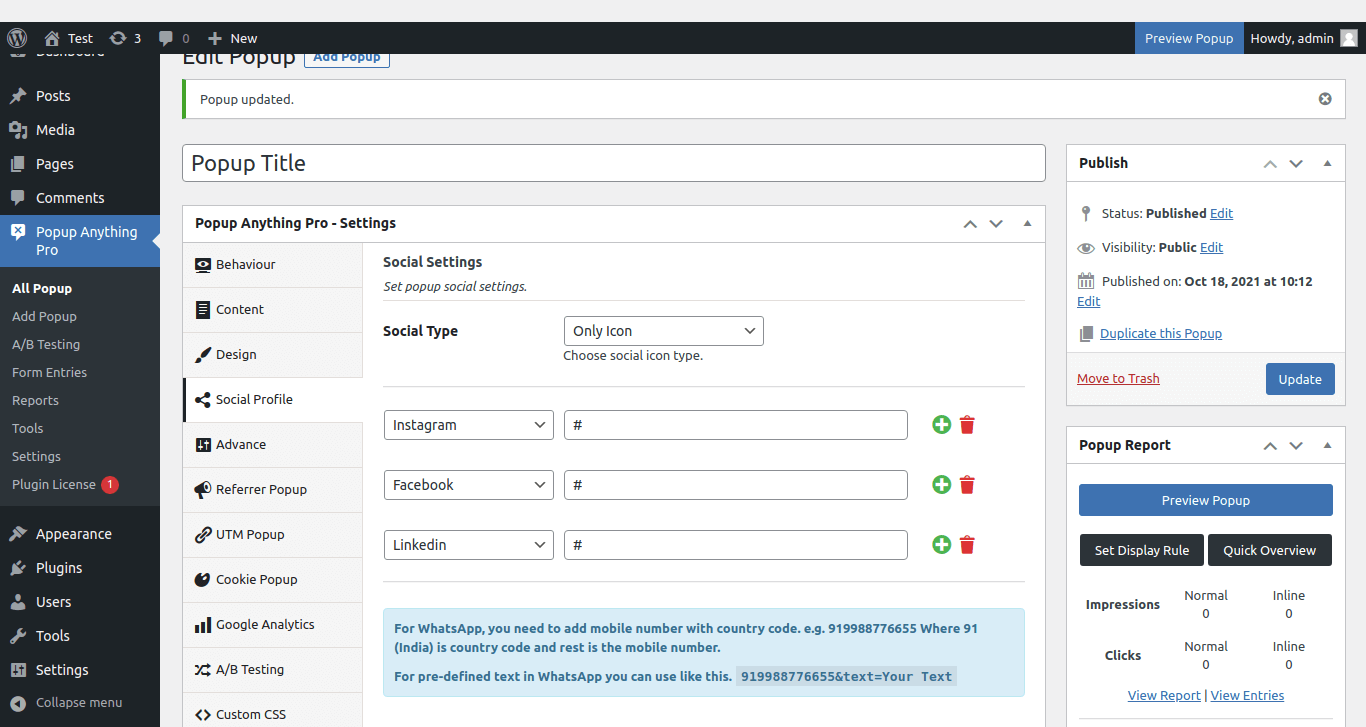
- 1. Social Type : You can Choose Only Icon, Only Text, Icon With Text. You can Add Multiple social icons Example : LinkedIn, Facebook , Instagram.
# Advance Settings :
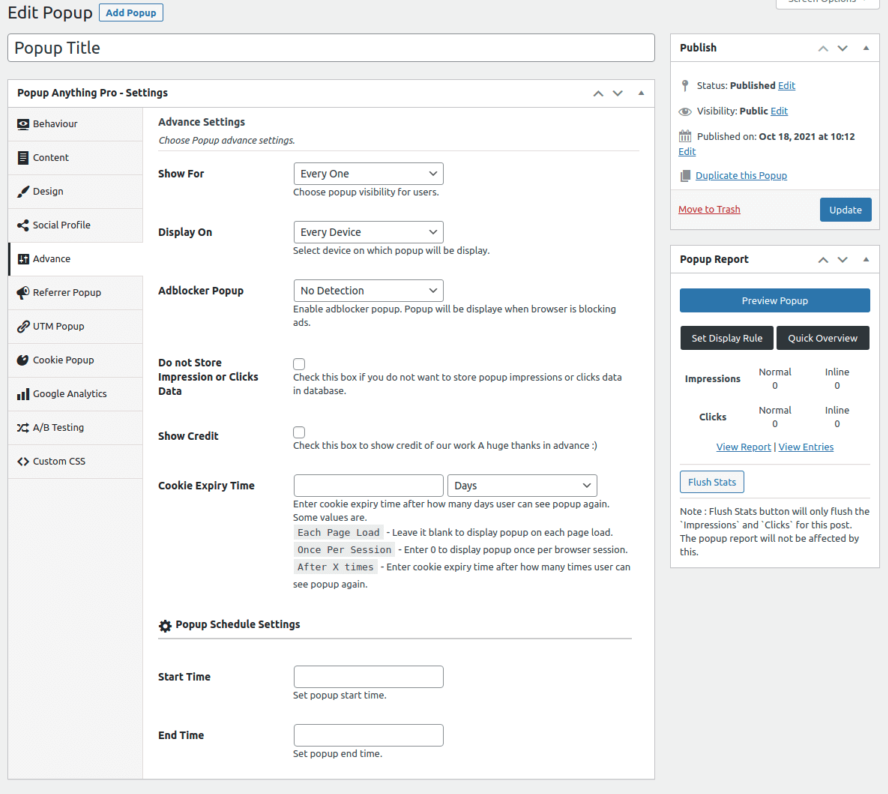
- Show For : Choose popup visibility for users.
- Display On : Select device on which popup will be display.
- Adblocker Popup : Enable adblocker popup. Popup will be display when browser is blocking ads.
- Do not Store Impression or Clicks Data : Check this box if you do not want to store popup impressions or clicks data in database.
- Show Credit : Check this box to show credit of our work A huge thanks in advance 🙂
- Cookie Expiry Time : Enter cookie expiry time after how many days user can see popup again. Some values are.
Each Page Load– Leave it blank to display popup on each page load.Once Per Session– Enter 0 to display popup once per browser session.After X times– Enter cookie expiry time after how many times user can see popup again.
A) Popup Schedule Settings :
- Start Time : Set popup start time.
- End Time : Set popup end time.
# Referrer Popup Settings :
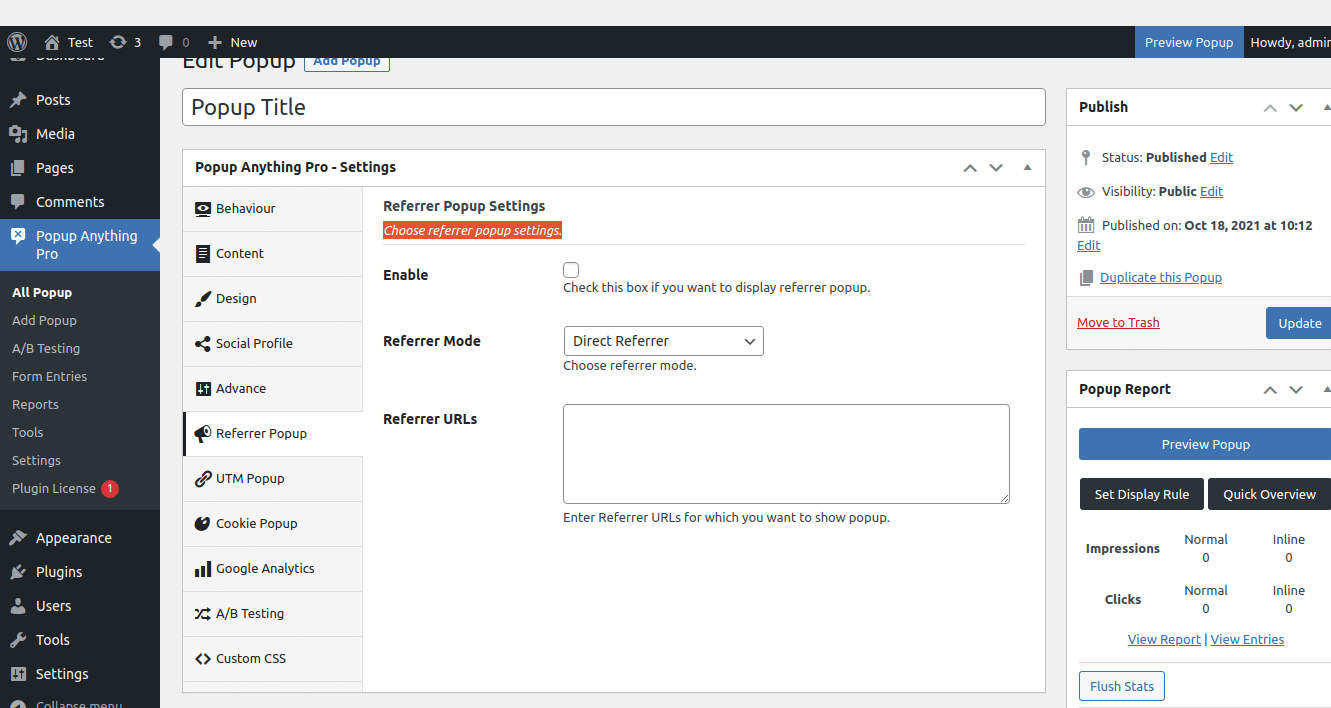
- Enable : Check this box if you want to display referrer popup.
- Referrer Mode : Choose referrer mode.
- Referrer URLs : Enter Referrer URLs for which you want to show popup.
# UTM Popup Settings :
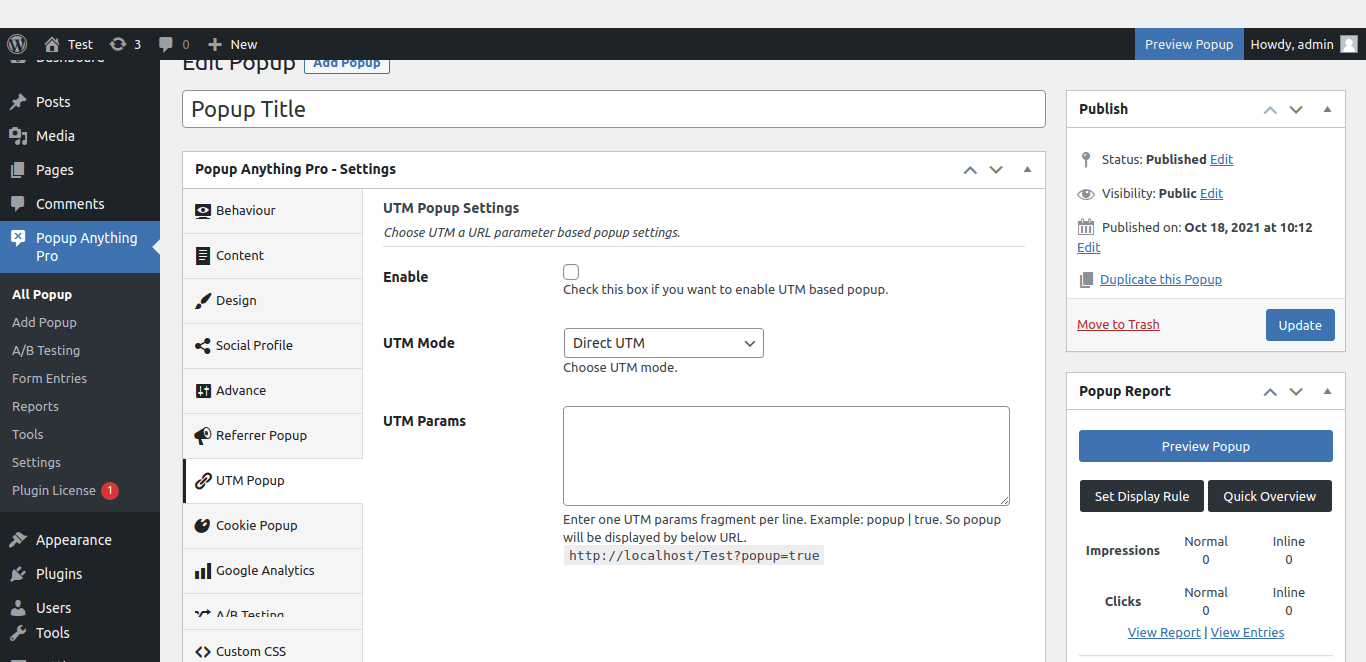
- Enable : Check this box if you want to enable UTM based popup.
- UTM Mode : Choose UTM mode.
- UTM Params : Enter one UTM params fragment per line. Example: popup | true. So popup will be displayed by below URL.
http://localhost/Test?popup=true
# Cookie Popup Settings :
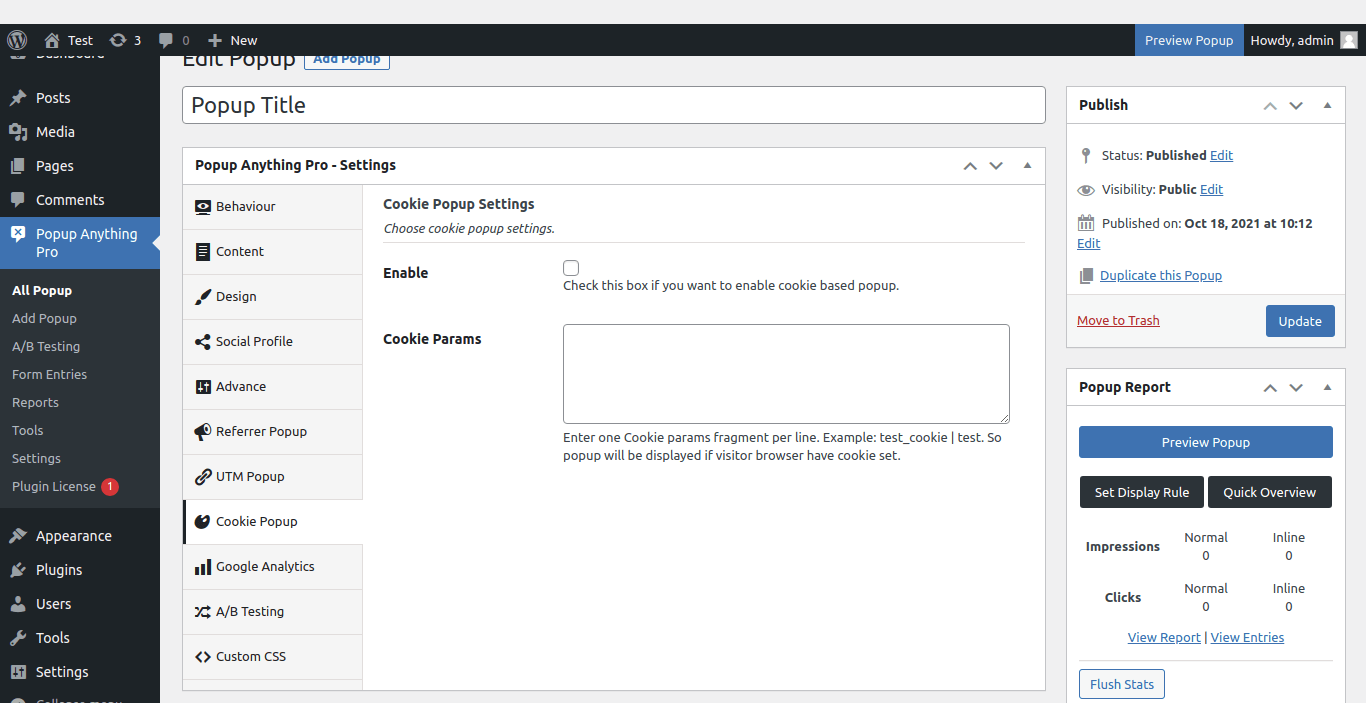
- Enable : Check this box if you want to enable cookie based popup.
- Cookie Params : Enter one Cookie params fragment per line. Example: test_cookie | test. So popup will be displayed if visitor browser have cookie set.
# Google Analytics Settings :
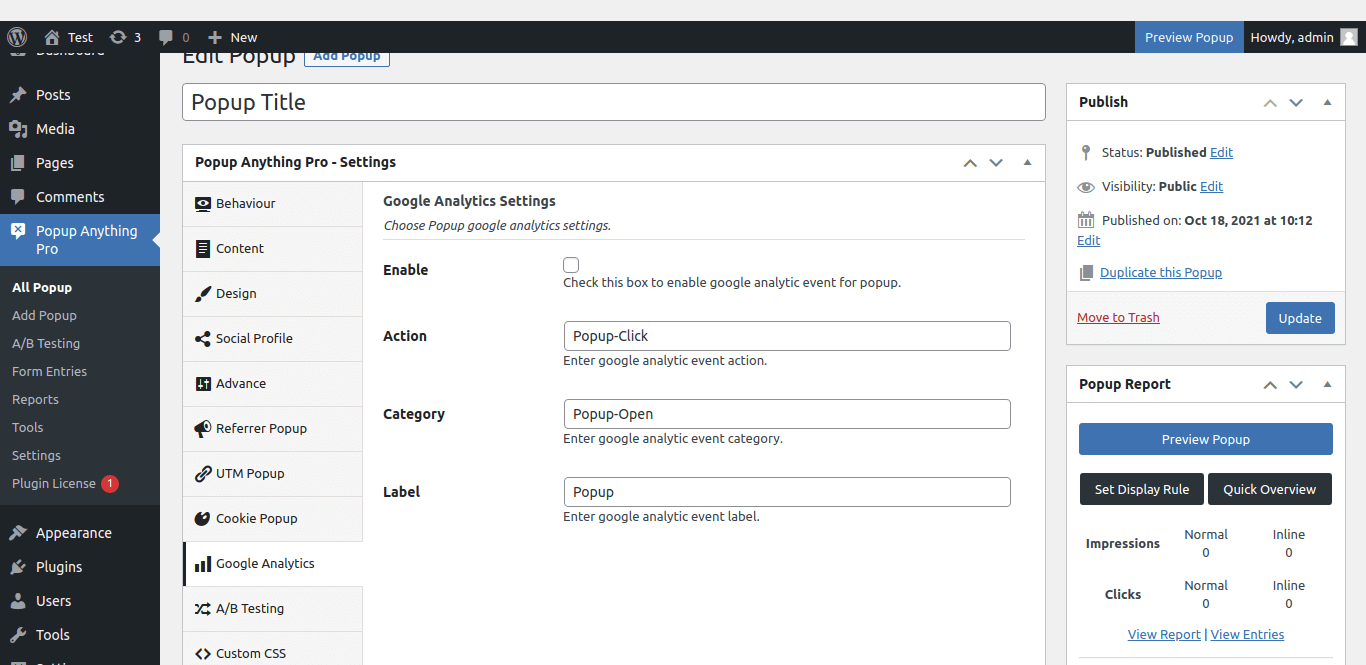
- Enable : Check this box to enable google analytic event for popup.
- Action : Enter google analytic event action.
- Category : Enter google analytic event category.
- Label : Enter google analytic event label.
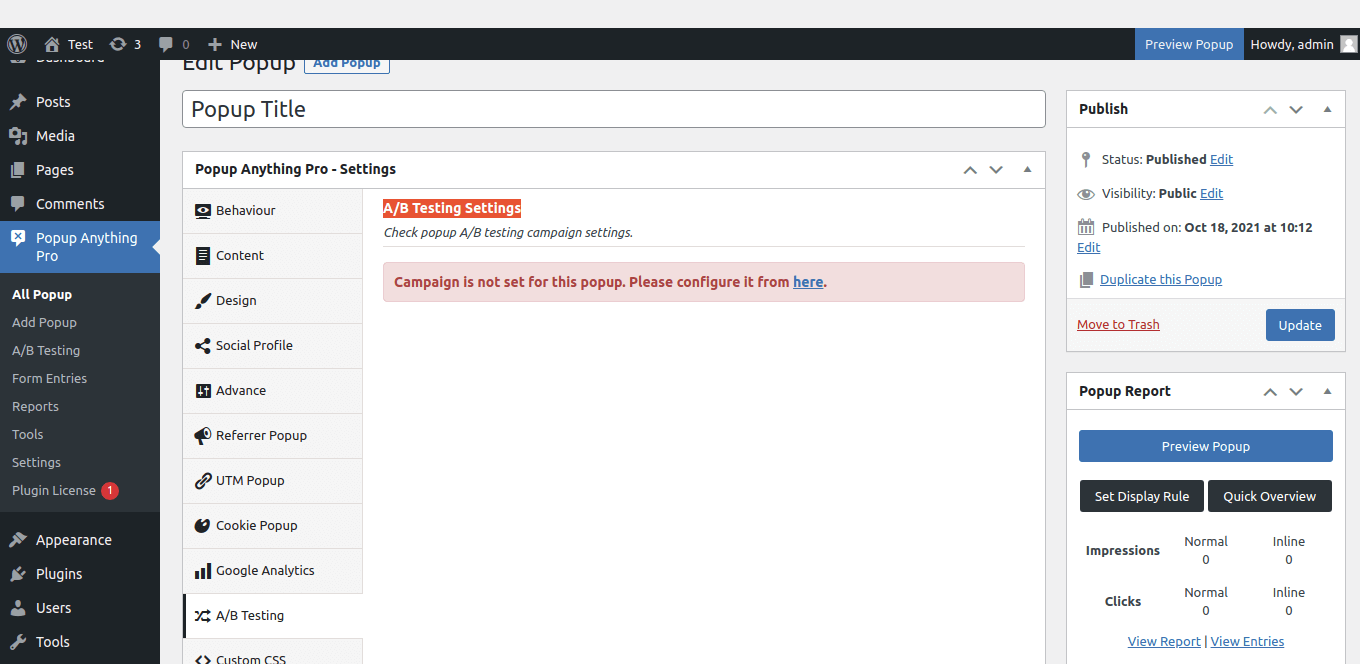
Popup Anything Pro – A/B Testing Campaign
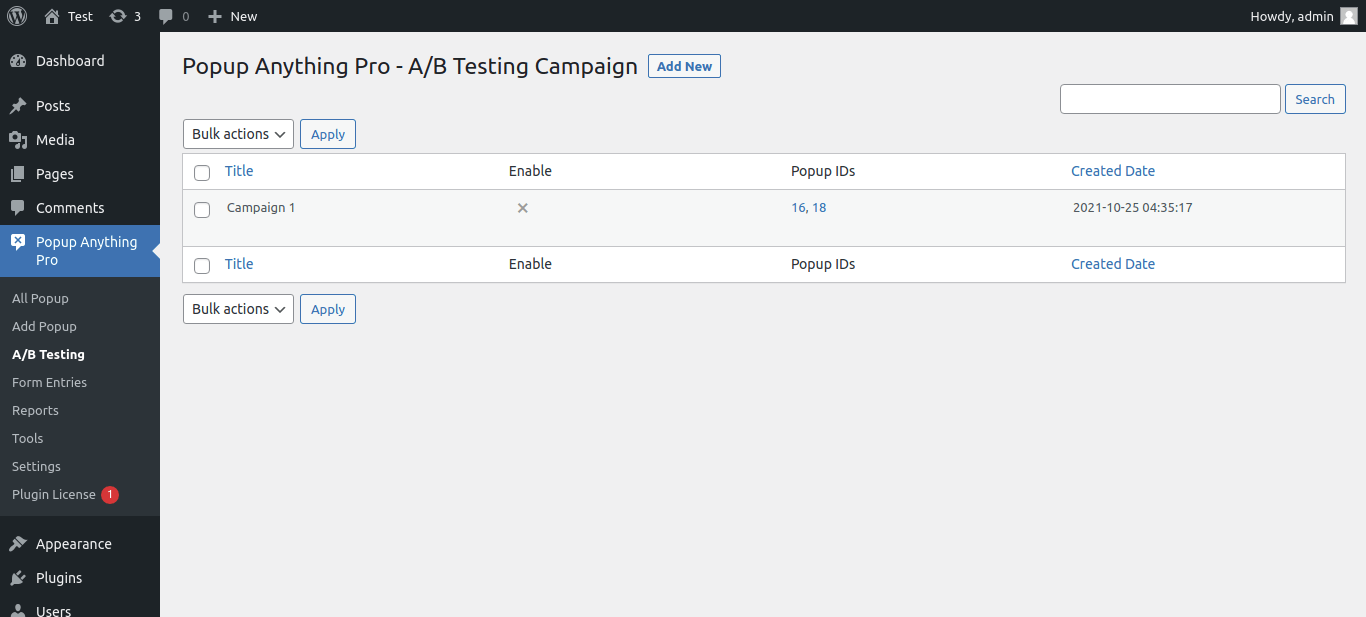
# A/B Testing Campaign
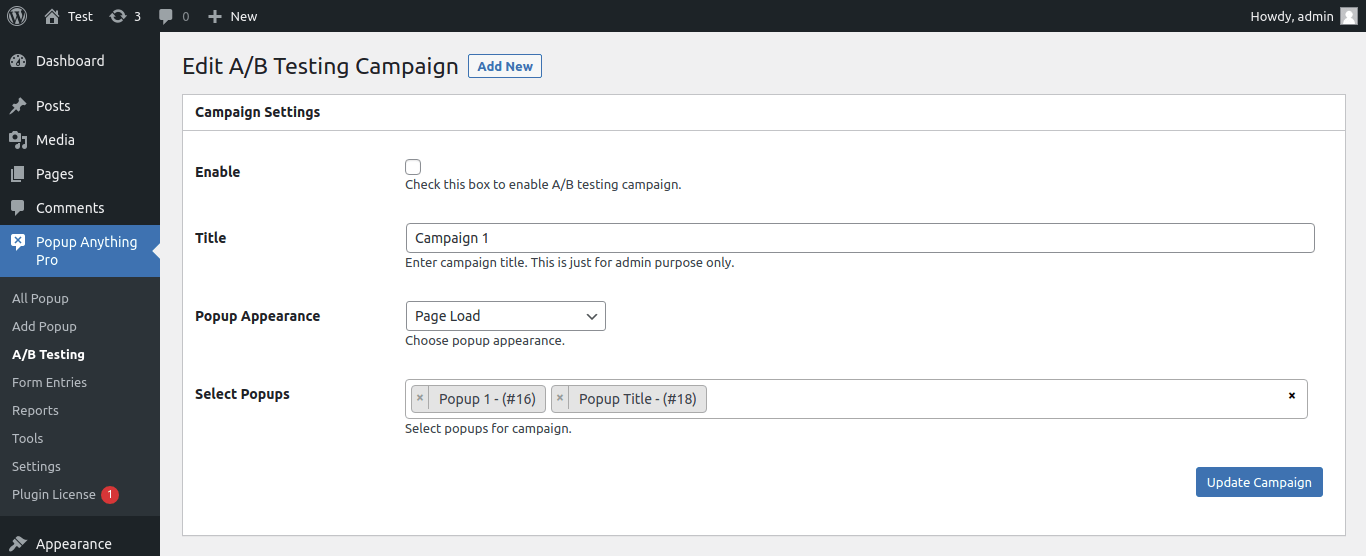
- Enable : Check this box to enable A/B testing campaign.
- Title : Enter campaign title. This is just for admin purpose only.
- Popup Appearance : Choose popup appearance.
- Select Popups : Select popups for campaign.