Getting Started
Countdown Timer Ultimate Pro adds a Menu tab in WP Admin side with the name “Countdown Timer Ultimate Pro” where you can add new Countdown Timer , edit and delete.
Screen shows “Countdown Timer Ultimate Pro” tab in the left side and All Countdown Timer added.

This plugin work same like WordPress post section where you can add title and featured image as timer background. To add a new Timer in plugin just need to follow few steps.
- Go to Countdown Timer Ultimate Pro Tab and click on Add Timer
- Add Timer title, Add Timer description, Add Timer Feature Image, Select Timer Style from Dropdown
Bellow screen shows how to add a Timer
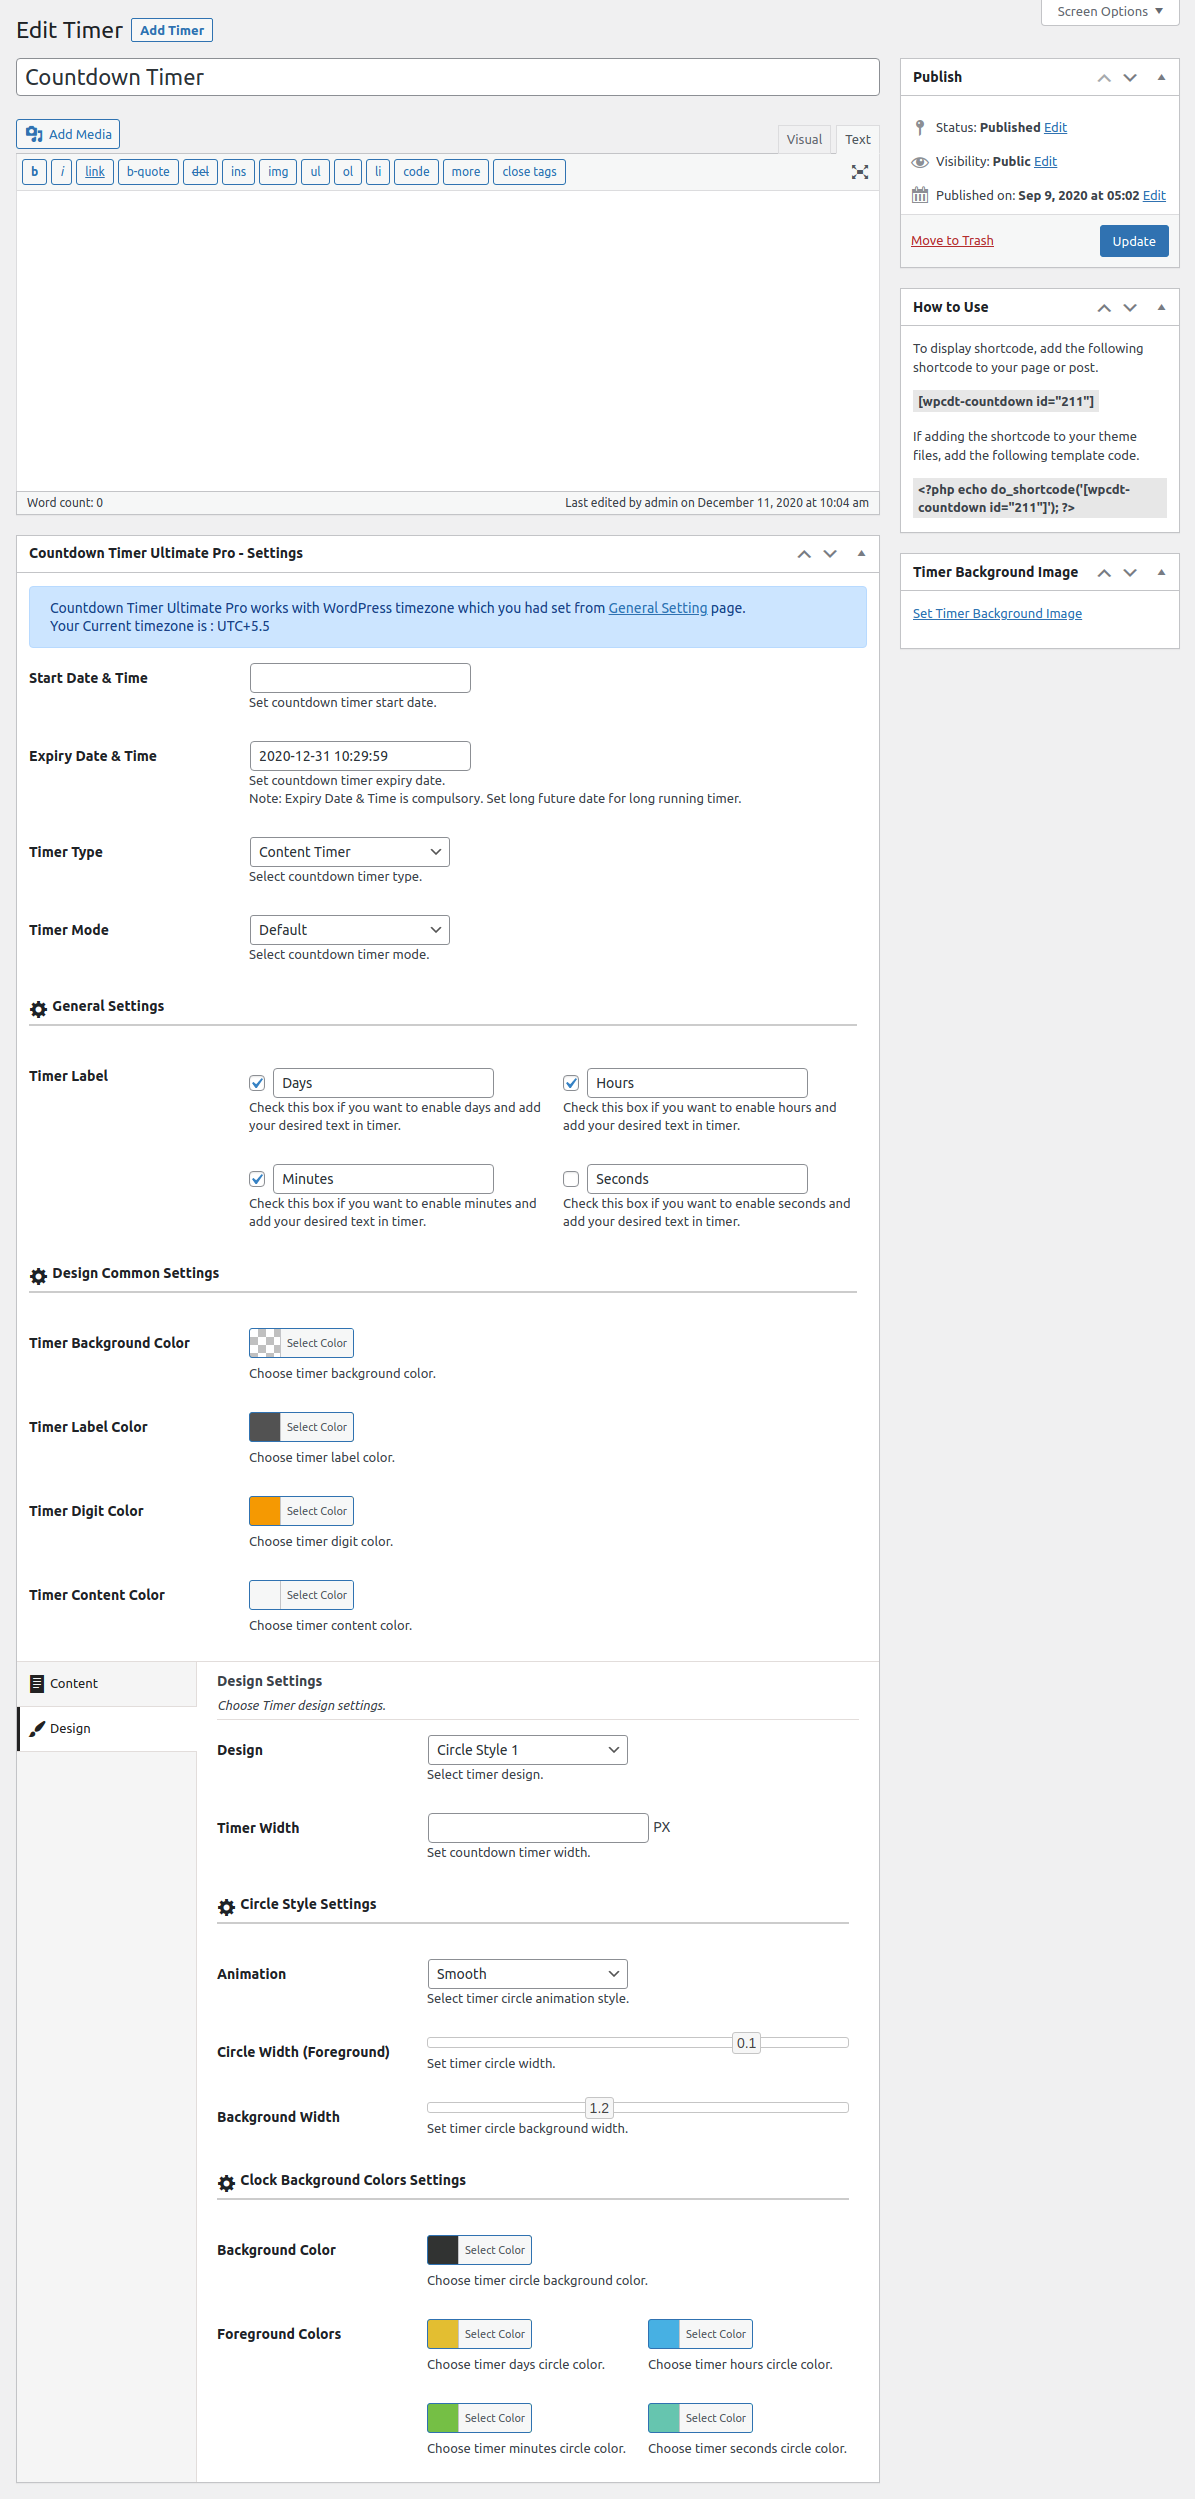
Default Timer Settings
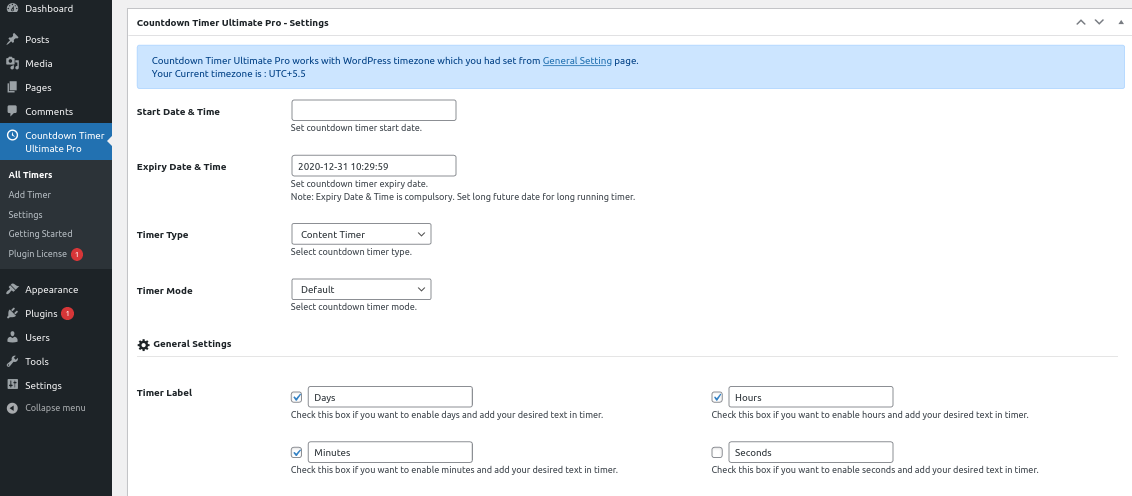
- Select Date & Time: Set countdown timer start date ad time.
- Expiry Date & Time: Set countdown timer expiry date.
- Timer Type: Select Countdown Timer type.
- Timer Mode: Select Timer mode. Values are Default, Evergreen and Recurring Timer.
- Timer Labels: Set your desired timer text instead of default. You can enable/disable label using checkbox.
Evergreen Timer Settings
Drive your user to make a positive buying decision faster with a personal countdown clock for each visitor. It will show the time left till the end of their personal offer, discount, or bonus and speed up sales. Once the timer will complete it will show a content message.
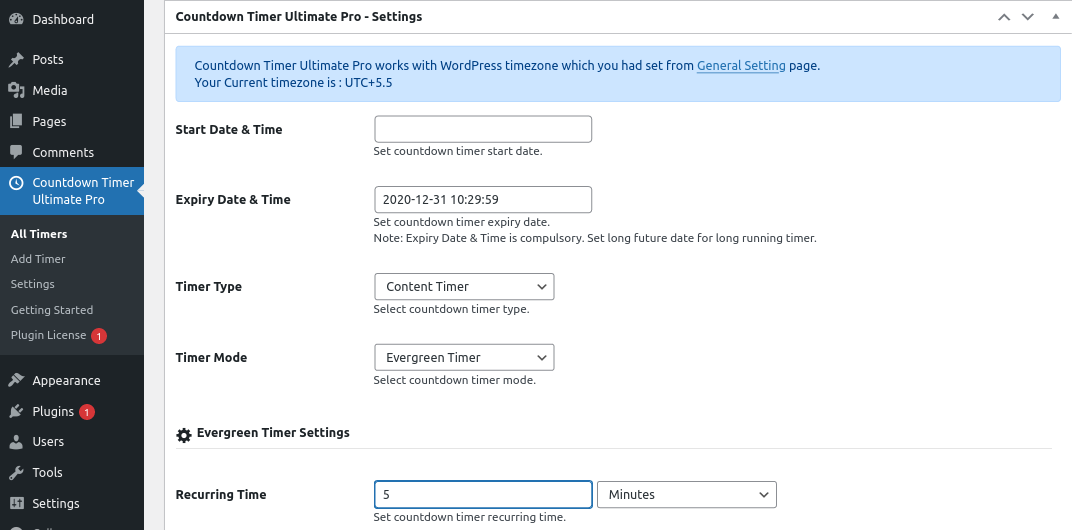
- For Evergreen Timer you have to select from Timer mode options. You can set future date and time for timer.
- Recurring Time: Set countdown timer recurring time. You can set by Minutes, Hours and days.
Recurring Timer Settings
You can schedule me for a particular date, month, and year so that the countdown timer starts running at that scheduled time.
For example, today is Monday and you want to schedule a timer for Friday then you need to add the Friday date and time. Once Friday scheduled date and time will be reached, the countdown timer will start running.
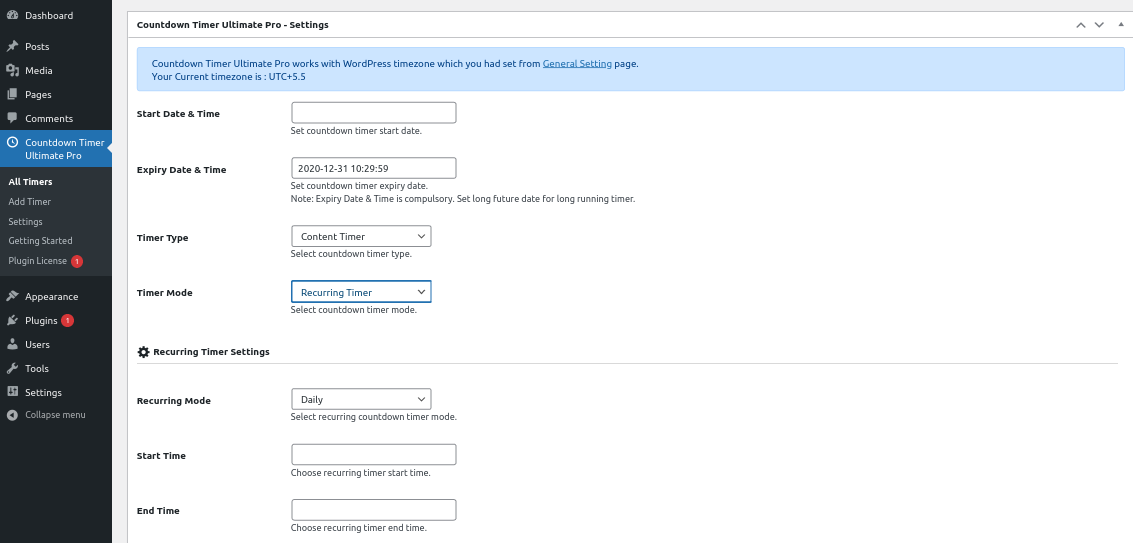
- For Recurring Timer you have to select from Timer mode options.
- Recurring Mode: Select recurring countdown timer mode. Values are Daily, Weekly and Custom.
Recurring Daily Timer Settings
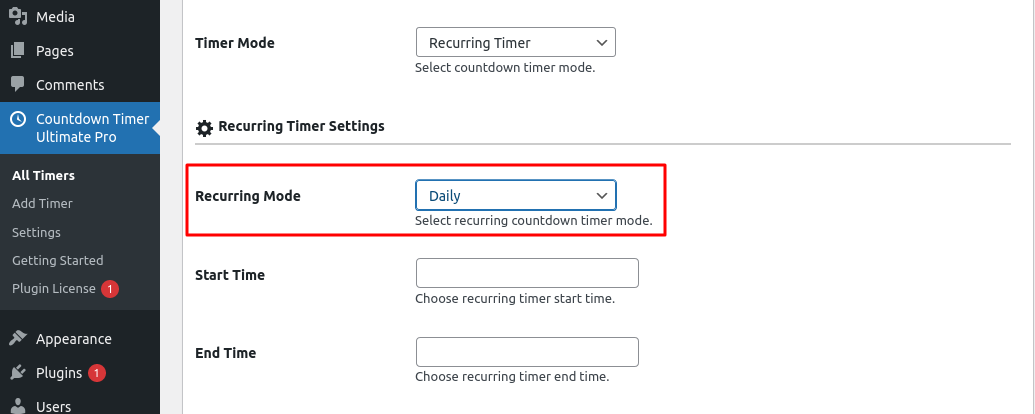
- Recurring Mode: Select recurring countdown timer mode. Values are Daily, Weekly and Custom. It will start automatically.
- Start Date: Set recurring timer start time.
- End Date: Set recurring timer end time.
Recurring Weekly Timer Settings
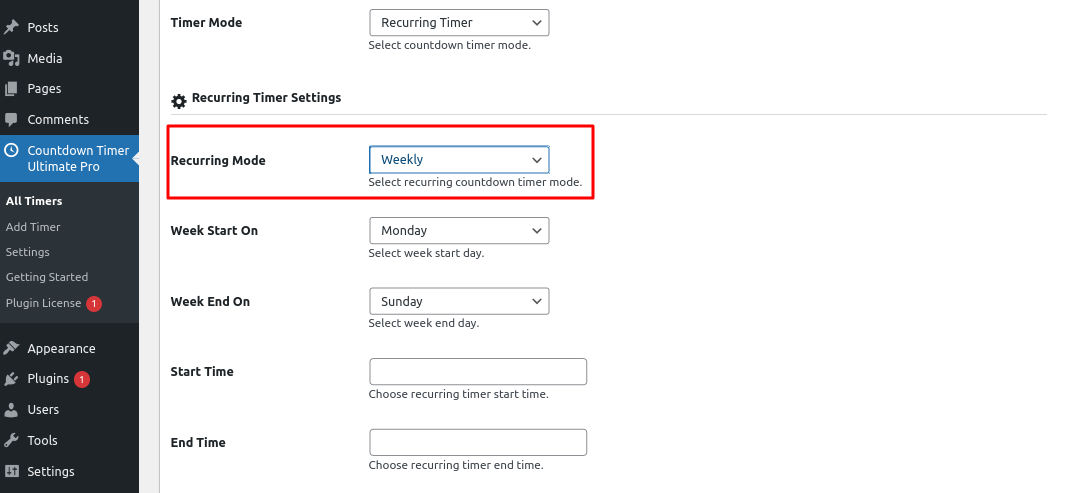
- Recurring Mode: Select recurring countdown timer mode. Values are Daily, Weekly and Custom. It will start automatically.
- Week Start On: Set week start day for timer.
- Week End On: Set week end day for timer.
- Start Date: Set recurring timer start time.
- End Date: Set recurring timer end time.
Recurring Custom Timer Settings
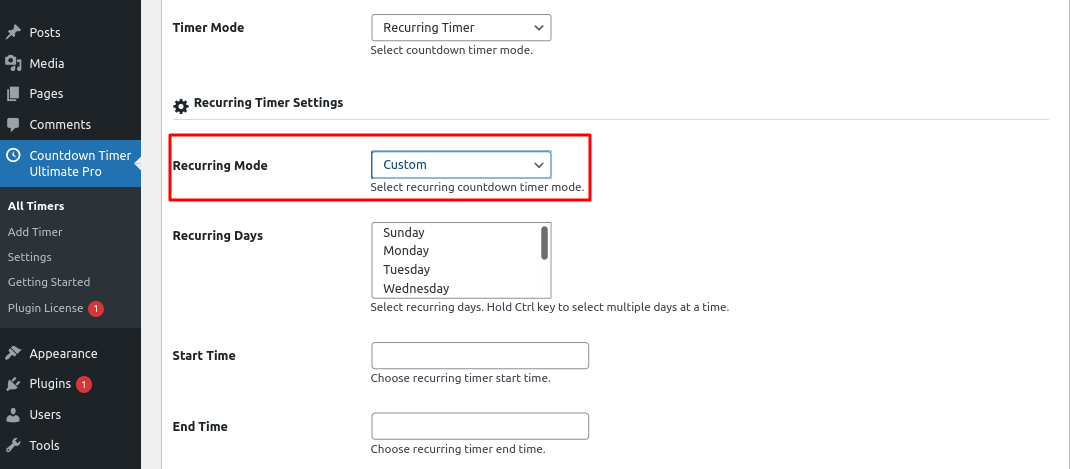
- Recurring Mode: Select recurring countdown timer mode. Values are Daily, Weekly and Custom. It will start automatically.
- Recurring Days: Set recurring days for timer. You can select multiple days also.
- Start Date: Set recurring timer start time.
- End Date: Set recurring timer end time.
Common Timer Design Settings
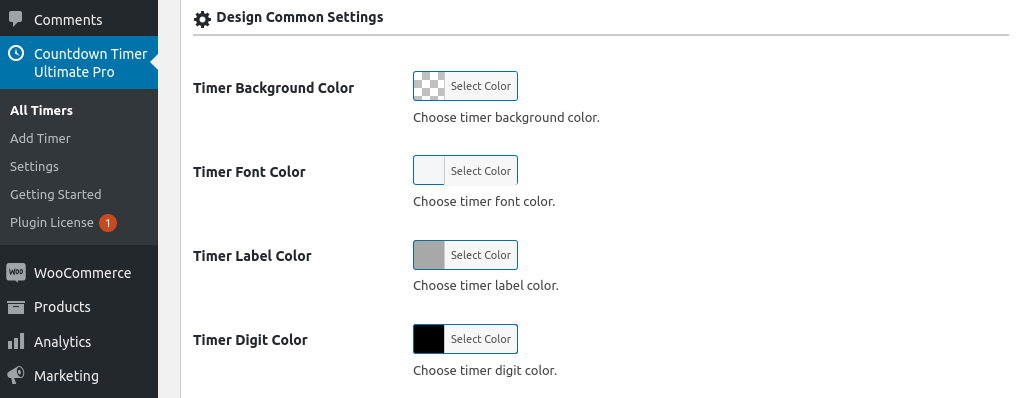
- Timer Background Color: Set countdown timer background color.
- Timer Font Color: Set countdown timer font color.
- Timer Label Color: Set countdown Timer label text color.
- Timer Digit Color: Set countdown timer digit color.
Timers Content Setting (Works with Content Timer)
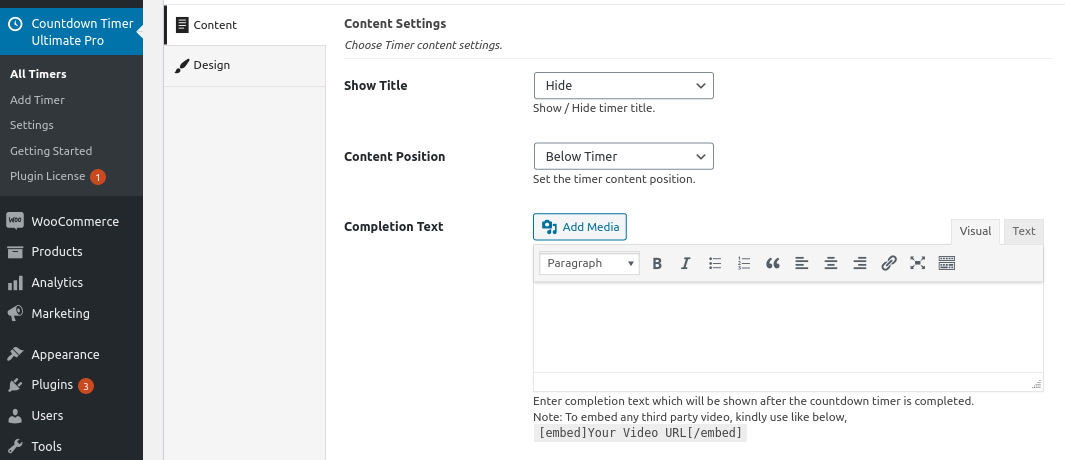
- Display Title: Display Countdown Timer Title or not.
- Display Content Position: Set countdown timer content positions.
- Completion Text: Enter completion text which will be shown after the countdown timer is completed.
Circle Timers Designs

- Timer Width: Set countdown timer width.
- Circle Animation: Select timer circle animation style (Works with circle style-1).
- Circle Width (Foreground): Adjust the width of circle with slider (Works with circle style-1).
- Circle Width: Adjust the width of circle with slider (Works with circle style-2).
- Background Width: Set timer circle background width.
- Background Color: Choose timer circle background color with color picker (Will not Work with circle style-3).
- Foreground Color: Choose individual circle color with color picker (Will not Work with circle style-3).
- Theme Color: Choose timer clock theme color (Work with circle style-3).
Flip Timers Designs

- Timer Design: Select timer designs. Values are “Horizontal and Vertical Flip”.
- Timer Width: Set countdown timer width.
- Theme Color: Choose timer clock theme color.
Simple Timers Designs
Simple Clocks are Pre defined Clock faces with no more customization. Just simple select the clock and populate it with id on your website.
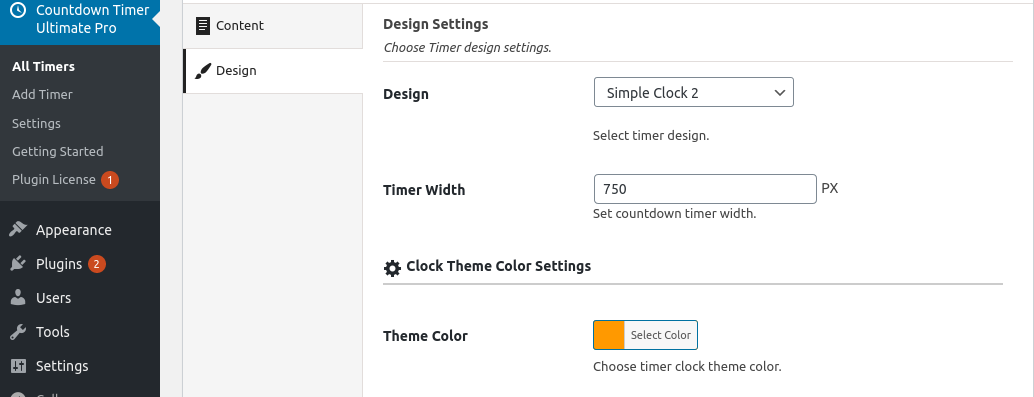
- Timer Width: Set countdown timer width.
- Theme Color: Choose timer clock theme color (Works with style-2 and style-4).
Other Timers Settings

- Select Timer Design: Select timer design from options, Values are “Modern Clock, Shadow Clock and Bars Clock”.
- Timer Width: Set countdown timer width.
- Theme Color: Choose timer clock theme color (Will not work with Bar Clock).
- Background Color: Choose timer circle background color for Bar Clock only.
- Foreground Colors: Choose foreground circle color for Bar Clock only.
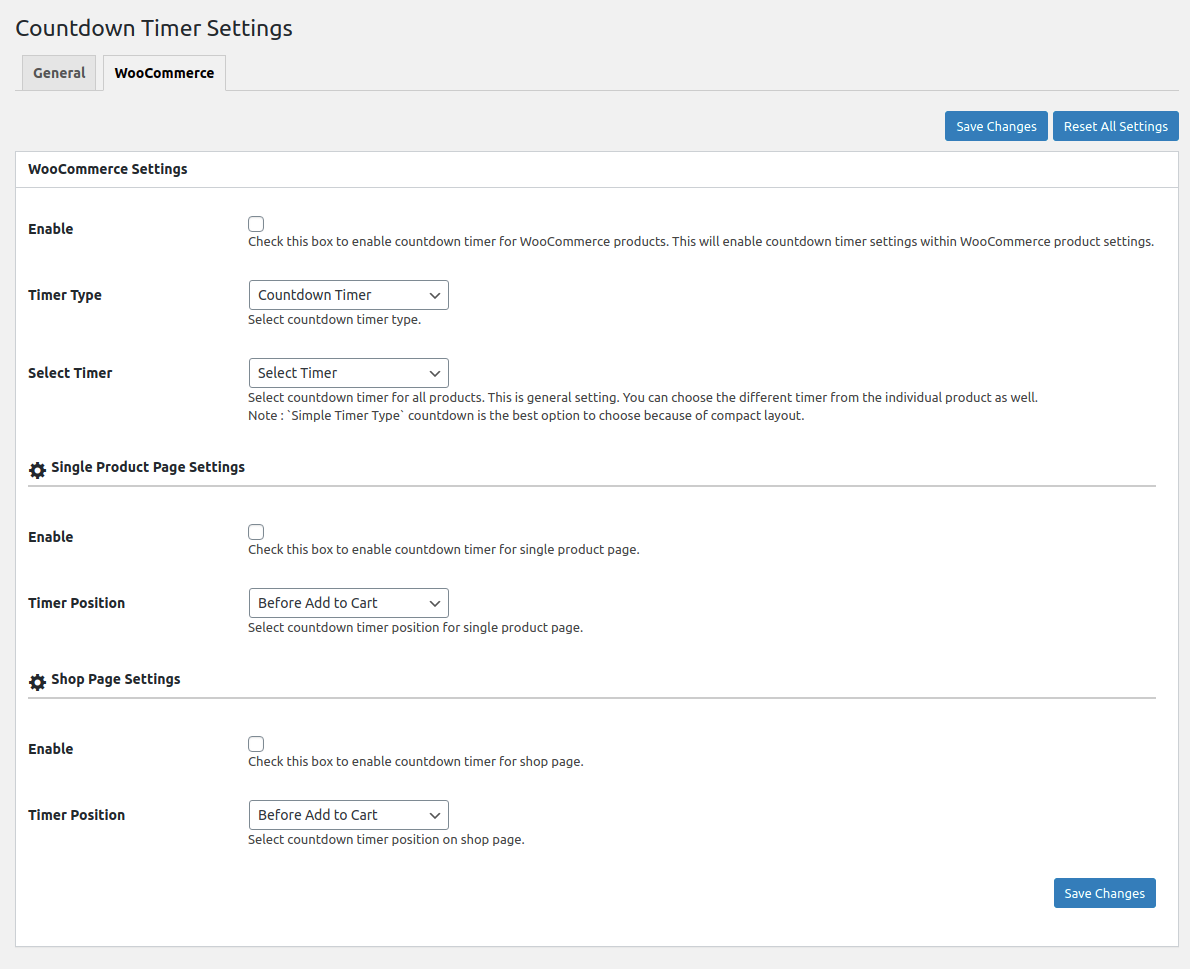
Configure Timer with WooCommerce Tab
First, you should have properly installed WooCommerce. You can find this option from setting menu under “Countdown Timer Pro” menu. There is an option for Enable/Disable timer for WooCommerce products. Also you can select Countdown Timer Type which you want. You can select timer for all products from dropdown which you have created. You can choose the different timer from the individual product as well.
Single Product Page Settings : You can enable/disable countdown timer for single product page. Also there is an option for Timer Positions. Set timer position as per your need.
Shop Page Settings : You can enable/disable countdown timer for shop page. Also there is an option for Timer Positions. Set timer position as per your need.
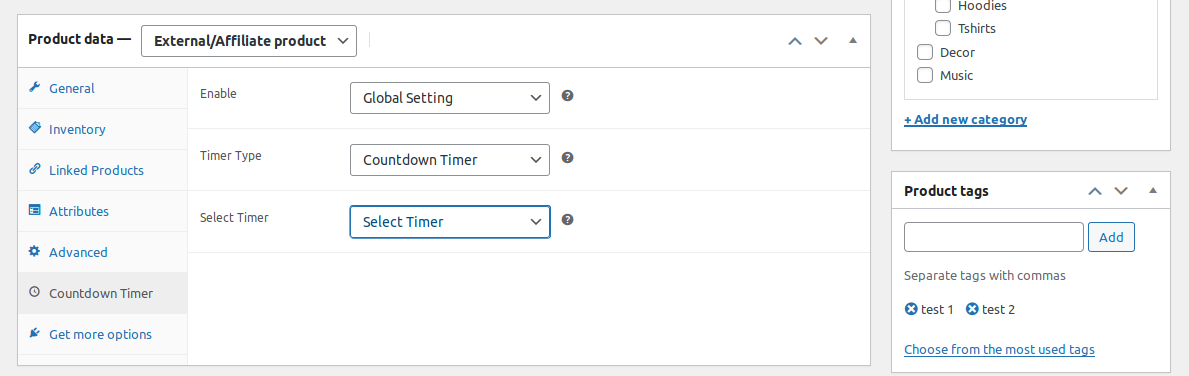
Configure Timer with Woo Commerce Products
If you have WooCommerce installed you can see Countdown Timer option in Product data menu. You can Enable Global setting for timer, Select Timer Type and Select Timer s which you have created within plugin.
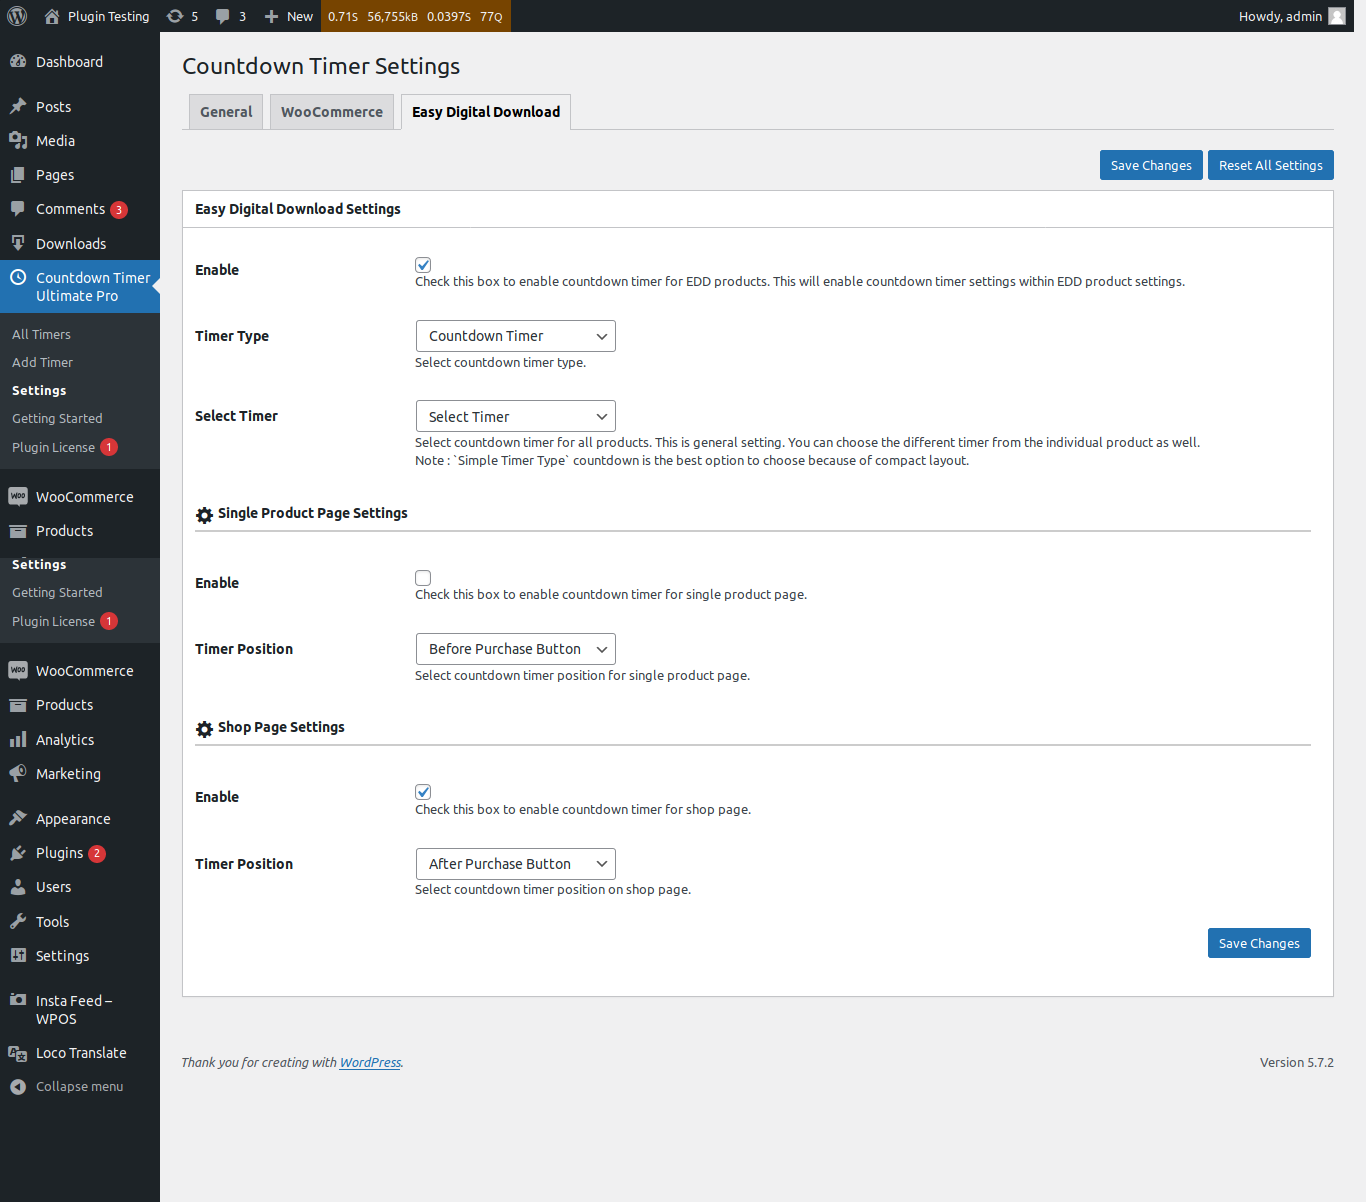
Configure Timer with EDD
First, you should have properly installed EDD. You can find this option from setting menu under “Countdown Timer Pro” menu. There is an option for Enable/Disable timer for EDD Products. Also you can select Countdown Timer Type which you want. You can select timer for all products from dropdown which you have created. You can choose the different timer from the individual product as well.
Single Product Page Settings : You can enable/disable countdown timer for single product page. Also there is an option for Timer Positions. Set timer position as per your need.
Shop Page Settings : You can enable/disable countdown timer for shop page. Also there is an option for Timer Positions. Set timer position as per your need.
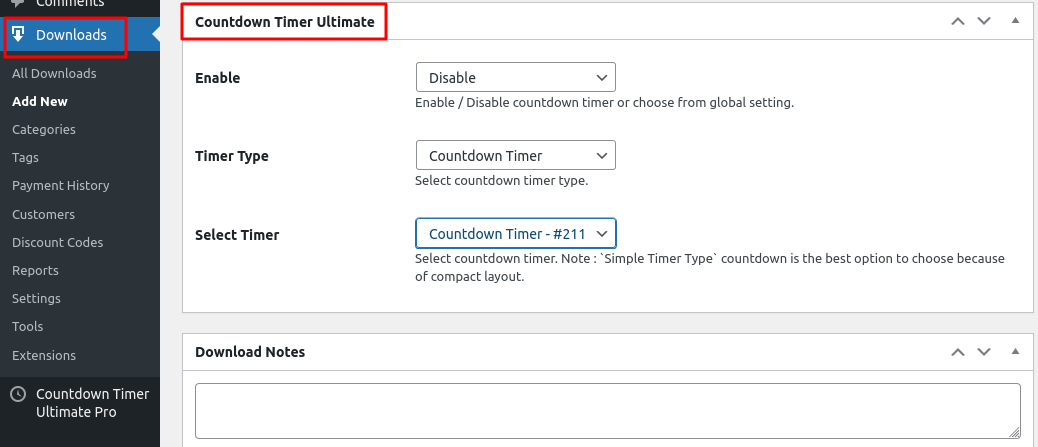
Select Timer with EDD
If you have EDD installed you can see Countdown Timer option in Product data menu. You can Enable Global setting for timer, Select Timer Type and Select Timer s which you have created within plugin.
Scheduled timer: Schedule timer for particular date , month and year so that the countdown timer start running on that scheduled time . For example today is Monday and you want to scheduled timer for Friday then you need to add Friday date and time. Once Friday scheduled date and time will be reached, countdown timer will start running.
Recurring timer (Content Timer): Drive your user to make a positive buying decision faster with a personal countdown clock for each visitor. It will show the time left till the end of their personal offer, discount, or bonus and speed up sales. Once the timer will complete it will show a content message.
Recurring timer (Simple Timer): It is same like Recurring timer ie show unique countdown timer to each user but once the timer will end it will show clock with 00-00-00-00. On page refresh timer will start running again.
How to display and shortcode
Here is the shortcode example[wpcdt_timer timer_id="XX" end_date="2021-01-26 23:59:59"] – Countdown Simple Timer[wpcdt-countdown id="XX"] – Countdown Timer[wpcdt_pre_text]Wtite Something[/wpcdt_pre_text] – Countdown Timer Pre Text
You can also use template code.<?php echo do_shortcode('[wpcdt_timer timer_id="XX" end_date="2021-01-26 23:59:59"]'); ?><?php echo do_shortcode('[wpcdt-countdown id="XX"]'); ?><?php echo do_shortcode('[wpcdt_pre_text]Wtite Something[/wpcdt_pre_text]'); ?>
Timer Shortcode Parameter
[wpcdt_timer]
- Timer ID
[wpcdt_timer timer_id=""]
You can Pass Unique id for recurring timer. - Start Date
[wpcdt_timer start_date=""]
You can set timer start date in this format: Y-m-d H:i:s - End Date
[wpcdt_timer end_date=""]
You can set timer start date in this format: Y-m-d H:i:s - Timer Mode
[wpcdt_timer timer_mode="default"]
You can set timer mode. Values are ‘default’, ‘evergreen’, ‘recurring’ - Recuring Mode
[wpcdt_timer recur_mode="daily"]
You can set recuring mode. Values are ‘daily’, ‘weekly’, ‘custom’ - Recurring Time
[wpcdt_timer recuring_time=""]
You can add numeric value. - Recurring Type
[wpcdt_timer recuring_type="minute"]
Set recurring type value. Values are “minutes, hours, day”. - Start Time
[wpcdt_timer start_time="00:00:00"]
You can set timer start time in this format : H:i:s. - End Time
[wpcdt_timer end_time="23:59:59"]
You can set timer end time in this format : H:i:s - Recuring On
[wpcdt_timer recur_on=""]
You can set Comma separate values of days number. Ex: 0, 1, 2, 3, 4, 5, 6. - Week Start
[wpcdt_timer week_start="1"]
You can set week start value. Ex: 0, 1, 2, 3, 4, 5, 6. - Week End
[wpcdt_timer week_end="0"]
You can set week end value. Ex: 0, 1, 2, 3, 4, 5, 6. - Display Days
[wpcdt_timer is_days="true"]
Display timer days or not. Values are “true” OR “false”. - Display Hours
[wpcdt_timer is_hours="true"]
Display timer hours or not. Values are “true” OR “false”. - Display Minute
[wpcdt_timer is_minutes="true"]
Display timer minutes or not”. Values are “true” OR “false”. - Display Seconds
[wpcdt_timer is_seconds="true"]
Display timer seconds or not. Values are “true” OR “false”. - Days Text
[wpcdt_timer day_text=""]
You can set your desired/own days label text. - Hours Text
[wpcdt_timer hour_text=""]
You can set your desired hours label text. - Minutes Text
[wpcdt_timer minute_text=""]
You can set your desired minutes label text. - Second Text
[wpcdt_timer second_text=""]
You can set your desired second lable text. - Extra Class:
[wpcdt_timer extra_class=""]
You can add extra class here.
Note: Extra class added as parent so using extra class you customize your design. - Display Caching
[wpcdt_timer is_caching="false"]
Keep timer caching or not. Values are “true” OR “false”.
Countdown Timer Parameter
[wpcdt-countdown]
- ID
[wpcdt-countdown id=""]
You can display specific ID wise. - Timer Completion Text Display
[wpcdt-countdown content_after_complete="true"]
You can display timer completion text or not. Values are “true” OR “false”. - Caching
[wpcdt-countdown is_caching="false"]
Keep timer caching or not. Values are “true” OR “false”. - Extra Class:
[wpcdt-countdown extra_class=""]
You can add extra class here.
Note: Extra class added as parent so using extra class you customize your design.
Template Structure + Overriding templates via a theme
The template files of countdown timer contain the markup and template structure for the front-end of your site. If you open these files you’ll notice they all contain many hooks which will allow you to add / move content without having to edit the template files themselves. This method protects even further against any upgrade issues as the template files can be left completely untouched.
Alternatively, you can edit these files in an upgrade safe way through overrides. Simply copy it into a directory within your theme named /countdown-timer-ultimate-pro, keeping the same file structure.
The copied file will now override the countdown timer default template file. Do not edit these files within the core plugin itself as they are overwritten during the upgrade process and any customizations will be lost.
The following template files can be found within the /countdown-timer-ultimate-pro/templates/ directory:
-
Click Here To See Template Hierarchy
- design-1.php to design-12.php
- loop-start.php
- loop-end.php
- circle.php